|
|
|
Who's Online
There currently are 6043 guests online. |
|
Categories
|
|
Information
|
|
Featured Product
|
|
|
 |
|
|
There are currently no product reviews.
 ;
Very good documentation for the Grundig 2077 model (as well as similar 800/900/1000 series radios). The first two pages are a summary of reception specifications and output capability. The third page is the tuner dial indicator and dial cord routing diagram. the final ~5 pages are the schematics for the various models (including 2077). The scan quality of the schematics are good, adn can be easily read if zoomed in. The documents are in German, not English as stated. It would have been nice to have the tuning sequence and settings, and some trouble shooting materials... or component and wiring map.
 ;
Perfect like it was descriped, Perfect like it was descriped
;
Very good detail, all pages clear, exactly what I needed
;
Excellent service, and just what I needed to service my TU-7700. All pages of the manual are clear and easily readable.
;
Excellent printing quality.
A complete and very usefull service manual with all details.
GREAT SERVICE AT VERY LOW PRICE!
A+++++++++++++++++++++++++
CH-X500
Disassembly method
Perform operations according to the items to be disassembled.
B
B
Bottom cover
<Replacement of the pickup>
1. After removing the exterior (top and bottom). 2. Proceed to the pickup replacement section. 3. When applying grease, refer to the exploded view. Use new grease.
B A B
Knob
Fig. 1
Remove A and turn in the direction of the arrow.
<Mechanism section>
1. Remove the exterior (required section only). 2. The mechanism section is designed so that each unit can be removed separately. 3. When reassembling, refer to the assembling precautions. (Use new grease when applying grease.)
Knob Bottom cover
B
B
B A B
<Exterior section>
Removing the bottom cover and front panel assembly (See Fig.1 to 4)
1. Remove the two screw A to unlock the mounting direction knob located on the side of the main unit. 2. Turn the mounting direction knob in the direction of the arrow using a coin, etc. to remove it. (The knob can be removed only when it is set to this position.) 3. Remove the four top cover fixing screws B at the triangle marks on the side of the main unit. (Perform the same operation on both sides.) 4. Turn the unit upside down so the bottom surface is facing upward. 5. Lift the rear edge of the bottom cover slightly and lift the side by grasping the DIN jack section on the side panel, then turn it toward the front (raise upward) to remove the bottom cover. 6. Unhook the four catches located on both sides of the front panel, and turn the front panel toward the top cover (lower down) to remove the front panel.
Remove A and turn in the direction of the arrow Fig. 2
The front panel can be separated by raising the cover.
Bottom cover
Fig. 3
Unhook catches
Slightly lift the jack section to remove.
Front panel Unhook catches
Fig. 4
1-4
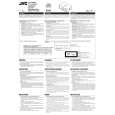 $4.99 CH-X500 JVC
Owner's Manual Complete owner's manual in digital format. The manual will be available for download as PDF file aft…
|
|
|
> |
|


