My first manual from Owner-Manuals.com but not the last! I am very satisfied with the easy ordering and promt delivery of a manual I did not find anywhere else.
This manual is very helpfull to use the Power Supply. All technical information has been available.
For service use the circuit diagrams are very good.
Thanks .
Very comprehensive document which is a must-have for any Satellit 2100 owner whose set up is somewhat intricate. Due to the bad quality of the pictures that are rather dark and a bit blurred I gave 4-star feedback.
The manual was missing 2 pages but when I presented the problem to the company they made every attempt to get the 2 pages to me, when they couldn't they refunded my money. A very pleasing and easy transaction. The manual they provided was the original, it was concise and to the point. I plan to do business with this company again when should the need arise.
Text excerpt from page 20 (click to view)
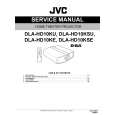
Installing the Projector (continued)
Projector and Screen Installation
The optimum image can be obtained when the center of this projector�s lens and the screen are placed perpendicular to each other. Take note of the projection angle when placing them. Failing to do so may give rise to trapezoidal distortion of the projected image.
� This unit does not come with a function to correct trapezoidal distortion or adjust horizontal gradient.
When viewed from the left (or right)
Screen
90°
90°
90° Center Line of
Lens
Install the projector such that the center of the projection screen is on the same level with the center of the lens when there is a 0 % shift (offset). Screen
90°
90°
90° Center Line of Lens
Install the projector such that the lower end of the projection screen is on the same level with the center of the lens when there is a 50 % shift (offset).