|
|
|
Who's Online
There currently are 5819 guests online. |
|
Categories
|
|
Information
|
|
Featured Product
|
|
|
 |
|
|
There are currently no product reviews.
 ;
Thank´s for your help, I already recived these manual from you
;
Thank you for your manual It has the basic things to and i use the Oszi for Longer Time.
THX
;
Actually, I was looking for this information for 3 years!...now thanks to you, the manual is on my hands and of great help, cause I understand now where I was doing wrong connections and wires...excellent, I'll be back to you if in need, thank you.
 ;
This manual covers the main equipment features only. While it also includes the procedure for saving and loading from the now long obsolete memory cards it does not mention the how to operate with the optional floppy drive interface so I am still at a loss about how to use this! Note that there is a separate manual covering the MIDI interface and programming via the keyboard, not included in this download. You will also need to get hold of this if you want to use the MIDI interface properly. Basically there is little difference between this manual and the free to download manual for the similar PR60 model.
;
Good list of manuals. I found a very rare one and easily get. Should be promptly to download, as we must to wait hours even after confirmed payment.
EN
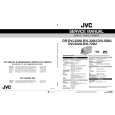
FEATURE: Video Light PURPOSE:
19
To brighten the scene when natural lighting is too dim.
OPERATION:
Set LIGHT OFF/AUTO/ON as required: OFF : Turns off the light. AUTO : Automatically turns on the light when the camcorder senses insufficient lighting on the subject. ON : Always keeps the light on as long as the camcorder is turned on. The video light can only be used with the camcorder�s power on. It is recommended to set the white balance ( pg. 43) to when you use the video light. When not using the video light, turn it off to save battery power.
LIGHT OFF/AUTO/ON Switch (Open the LCD monitor to access this switch.)
DANGER
The video light can become extremely hot. Do not touch it either while in operation or soon after turning it off, otherwise serious injury may result. Do not place the camcorder into the carrying case immediately after using the video light, since it remains extremely hot for some time. When operating, keep a distance of about 30 cm (11-13/16") between the video light and people or objects. Do not use near flammable or explosive materials. Do not place the camcorder in a cabinet or box while the video light is in operation. When using the video light, if you wish to install the camcorder in a fixed position, attach it to a tripod, etc. Do not affix it directly to a surface such as a table top. It is recommended that you consult your nearest JVC dealer for replacing the video light.
NOTES:
� Even if the battery indicator ( ) does not blink due to low battery charge, the camcorder may turn off automatically when you turn on the video light, or when you start recording with the video light turned on. � When LIGHT OFF/AUTO/ON is set to �AUTO�: � Depending on the lighting conditions, the video light may keep turning on and off. In this case, manually switch the light on or off using LIGHT OFF/AUTO/ON. � While the �SHUTTER� or �SPORTS� mode ( pg. 37) is engaged, the light is likely to stay on. � While the �TWILIGHT� mode ( pg. 37) is engaged, the light will not activate. � While the �Night-Alive� mode ( pg. 36) is engaged, the light will not activate.
|
|
|
> |
|