There are currently no product reviews.

;
So usefull to make my installation a breeze. 5 stars on quality.
;
very helpful, the information in these manuels are very detailed
;
Please tell us what you think and share your opinions with others. Be sure to focus your comments on the product. You will receive $2.00 of store credit for Your review.
;
Please tell us what you think and share your opinions with others. Be sure to focus your comments on the product. You will receive $2.00 of store credit for Your review.
;
Good copy and great customer service! There was some confusion with my order and it was resolved promptly!
Initial Settings
Video Channel Set
Video channel (RF output channel) is the channel on which your TV receives picture and sound signals from the video recorder through the RF cable. Before performing the following steps, make sure the recorder�s power is off and there is no cassette inserted in the recorder. If you have connected the video recorder to your TV via the provided RF cable only (RF connection)... A Hold down STOP/EJECT (0) on the recorder until the display panel shows the following. B Press PR+ or � on the remote control to set appropriate TV system that matches the system of TV being used (refer to the table below). 1:B/G 2:D/K 3:I 4:H 5:M Major Countries/Areas New Zealand, Kuwait, U.A.E., Indonesia, Singapore, Thailand, Malaysia, Iran, Saudi Arabia, Egypt, Morocco, Lebanon, Iraq China, Mongolia, Russia Hong Kong Australia U.S.A., Japan, S. Korea, Taiwan * HR-J787AM only C Set your TV to UHF channel 36. � If the two vertical white bars appear clearly on the screen as shown on the right, press OK and then go to step D. � If the two vertical white bars do not appear clearly, press OK and then PR + or � to set the recorder to a vacant channel between 28 and 60 which is not occupied by any local station in your area. (Ex.) If channel 50 is available in your area... Then set your TV to UHF channel 50 and check if the two vertical white bars appear clearly on the screen; if so, go to step D. If not, re-set the recorder to another vacant channel and try again. D Press OK to finish video channel set. If you have connected the video recorder to your TV via both the provided RF cable and an AV cable (AV connection)... A Hold down STOP/EJECT (0) on the recorder until the display panel shows the following. B Press OK, then press PR � until the display panel shows the following. Now the video channel is set to off (� �). TV System B/G D/K H M* I
D Close the battery cover until it clicks in place.
Auto Set Up
The Auto Set Up function simplifies installation by guiding you through the procedures of setting the language, clock and tuner channels � simply follow the on-screen menus that appear. � Turn on the recorder and the TV, and set your TV to its AV mode or video channel.
A Select language
Press rt to place the pointer next to your desired language (English, Chinese or Russian), then press OK or e. � The Clock Set screen appears.
B Set time
Press rt to set the hour, then press OK or
CLOCK SET TIME 0 : 00 DATE 01.01 YEAR 01
e.
� Press and hold either button to delay or advance the time by 30 minutes.
C Set date
[
[MENU] : EXIT
/
]
Press rt to set the date, then press OK or e. � Press and hold either button to change the date by 15 days.
D Set year
Press rt to set the year, then press MENU.
E Select TV system
Press rt to place the pointer next to the appropriate TV system (refer to the table below). Major Countries/Areas Australia, New Zealand, Kuwait, U.A.E., Indonesia, Singapore, Thailand, Malaysia, Iran, Saudi Arabia, Egypt, Morocco, Lebanon, Iraq China, Mongolia, Russia Hong Kong U.S.A., Japan, S. Korea, Taiwan * HR-J787AM only TV System B/G D/K I M*
C Press OK to finish video channel set. � If Auto Set Up or Tuner Set has not previously been performed, the Language Select screen appears and Auto Set Up function takes place automatically.
F Start auto channel set
Press OK or e. AUTO CH SET � Receivable channels in your area are PLEASE WAIT automatically assigned to the PR+/� buttons, and non-receivable channels START FINISH IIIIIIIIIIII������� are skipped. � When Auto Set Up is completed, the lowest position number will appear on the front display panel. If �SCAN COMPLETED�NO SIGNAL�� is displayed on the screen, make sure that the areal cable is connected to the recorder properly and press OK on the remote control. The recorder will try Auto Set Up again.
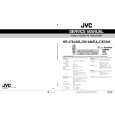
Installing/Removing the lithium battery
Be sure to connect the power plug to an AC outlet first before installing the lithium battery; otherwise, the battery�s service life will be drastically shortened. A Make sure that the power plug is connected to an AC outlet and turn off the recorder power. B Open the battery cover while pressing the release tab as illustrated. C Insert a lithium battery with the plus (+) side up and push it in. � To remove the lithium battery, press the latch downward using a pointed non-metallic object, then pull out the lithium battery.