|
|
|
Who's Online
There currently are 6043 guests online. |
|
Categories
|
|
Information
|
|
Featured Product
|
|
|
 |
|
|
There are currently no product reviews.
 ;
Excellant!!! Very quick and easy....Best $4.99 I have spent in a very long time..
I highly recommend this.
;
Thanks so much for the Owner's manual for my Sony PS - FL1. I had purchased the turntable off of eBay. It came in and looked great. Packed well and appeared to be great. I balanced and aligned the tone are and hooked it up. When trying to play a record the tone are would move to the right place and just before it would drop to play it moved back off the edge of the record before touching down. I searched the net for an answer to this issue. No luck. Then I purchased the owners manual and sure enough there was a place to adjust where the stylus touched down. That adjustment solved the problem and saved me a $35 feet to have the player checked out. The manual is well written and easy to understand. It is a must have for anyone with this front loading Sony turntable.
;
Some years back I pruchased a Sansui G-9000. I had it cleaned up and a problem with the left channel repaired. When I got it back I hooked it up to my tape decks, turn tables, TV and it played great. The only thing I was not really satisfied with was the performance of my Graphic Equalizer. I purchased this owner's manual had poured myself a cup of coffee. The manual is well organized and written in plain language. It also contained the solution to my dissatisfaction. By using the preamp connections coupled I was able to run everything through my graphic equalizer and now enjoy the full potential of my complete system.
 ;
An excellent service for the price, however, it would also have been handy if the troubleshooter pages were included. The manual is only sent in the language of your country, thus it looks as though there are some pages missing. Otherwise highly recommended.
;
I am happy to get a rare TECHNICS SH-9090 Owner's Manual by PDF in clear copy.
AV COMPU-LINK � ON/OFF
The REMOTE PAUSE/AV COMPULINK terminal on the rear panel can be used as either the REMOTE PAUSE terminal or the AV COMPULINK terminal. � When this function is set to �ON�, you can use this terminal as the AV COMPULINK terminal. By connecting other JVC�s AV COMPULINK components, including amplifiers (or receivers) and televisions, one touch control of the audio and video components linked via their AV COMPULINK connectors becomes possible. � When this function is set to �OFF�, you can use this terminal as the REMOTE PAUSE terminal. If your JVC camcorder is equipped with the Master Edit Control, you can control the VCR from the camcorder. Connect the mini-plug cable (not supplied with this VCR) between the REMOTE PAUSE terminal and the EDIT connector on the camcorder.
Child Lock
� Turn on the VCR and TV, and select the VCR channel (or AV mode). � Set the VCR/TV/CABLE/DBS selector on the Remote to �VCR�. You can disable the VCR operations. While the VCR is turned on, press and hold POWER on the Remote for more than 10 seconds. The VCR turns off, �CL� Child lock appears for about 5 seconds on the display indicator panel. To release the child lock, press and hold POWER on the Remote until the VCR turns on.
NOTES:
� Pressing TIMER (#) during timer recording, unplugging the AC power cord or a power outage also releases the child lock. � Even if the child lock function is in use, it is possible to engage and disengage the timer mode with TIMER (#) on the Remote. Keep the Remote out of the children�s reach. � Timer recording programs will be performed even if the child lock function is activated.
NOTE:
Refer to the other components� instruction manuals for connection and its operations.
FRONT AUX INPUT � VIDEO/S-VIDEO
You have to select which terminal � either VIDEO (composite) or S VIDEO (Y/C separate signals) to use as the video input terminal on the front panel. Make sure to select the correct terminal; otherwise, you may fail in recording (editing) on this VCR.
JLIP ID Number Setting
� Turn on the VCR and TV, and select the VCR channel (or AV mode). � Set the VCR/TV/CABLE/DBS selector on the Remote to �VCR�. The JLIP (Joint Level Interface Protocol) terminal is used to connect the VCR to a personal computer or similar device. By connecting through the JLIP terminals, you can control the VCR during editing and certain other operations, from the connected personal computer or similar device. When connecting this VCR to another device using the JLIP terminals, each device must have a different JLIP ID number. The JLIP ID number of this VCR is preset to �1� when shipped from the factory. You can change this number to any other number between 1 to 99.
REAR AUX INPUT � VIDEO/S-VIDEO
You have to select which terminal � either VIDEO (composite) or S VIDEO (Y/C separate signals) to use as the video input terminal on the rear panel. Make sure you select the correct terminal; otherwise, you may fail in recording (editing) on this VCR.
Satellite Auto Recording
You can automatically record a satellite program which is timerprogramed on your DBS receiver. � Turn on the VCR and TV, and select the VCR channel (or AV mode). � Set the VCR/TV/CABLE/DBS selector on the Remote to �VCR�.
NOTE:
For further details on the JLIP system or devices, consult your nearest JVC dealer. Press MENU on the Remote. Press rt to move the highlight bar (arrow) to �INITIAL SET�, then press OK or e.
A Connect a DBS receiver to the AUDIO/VIDEO IN or S VIDEO IN
connectors* on the rear panel. You can also connect the cable box if it has a timer.
* To use these connectors, you have to select which one to use. ( See above, �REAR AUX INPUT�.)
A Access Main Menu screen, then Initial Set screen B Access JLIP ID Number Set screen
B Set timer program on DBS receiver using its instruction C
manual. Load a cassette with the record safety tab intact. speed will appear on the TV screen.
Press rt to move the highlight bar (arrow) to �JLIP ID NO. SET�, then press OK or e.
D Press SP/EP (p) to set the tape speed. The selected tape E Press REC LINK for more than 2 seconds. The VCR turns off
C Set JLIP ID number
Press the appropriate Number keys on the Remote to enter the desired ID number, then press OK. Press MENU to return to normal screen.
automatically and enters the Satellite Auto Recording standby mode and the REC LINK lamp lights. When the DBS receiver outputs a signal, the VCR starts recording and the REC LINK lamp blinks. The VCR stops recording and powers off when the DBS receiver stops outputting a signal.
NOTES:
� Be sure not to turn on the DBS receiver before the program starts broadcasting; otherwise, the VCR will start recording when the DBS receiver is turned on. � To disengage the Satellite Auto Recording standby mode, press REC LINK (the REC LINK lamp goes off). � Depending on the type of DBS receiver, Satellite Auto Recording may not be compatible.
� 21 �
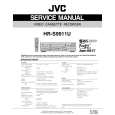 $4.99 HRS9911U JVC
Service Manual Complete service manual in digital format (PDF File). Service manuals usually contains circuit diagr…
|
|
|
> |
|