|
|
|
Who's Online
There currently are 5864 guests online. |
|
Categories
|
|
Information
|
|
Featured Product
|
|
|
 |
|
|
There are currently no product reviews.
 ;
Thank´s for your help, I already recived these manual from you
;
Thank you for your manual It has the basic things to and i use the Oszi for Longer Time.
THX
;
Actually, I was looking for this information for 3 years!...now thanks to you, the manual is on my hands and of great help, cause I understand now where I was doing wrong connections and wires...excellent, I'll be back to you if in need, thank you.
 ;
This manual covers the main equipment features only. While it also includes the procedure for saving and loading from the now long obsolete memory cards it does not mention the how to operate with the optional floppy drive interface so I am still at a loss about how to use this! Note that there is a separate manual covering the MIDI interface and programming via the keyboard, not included in this download. You will also need to get hold of this if you want to use the MIDI interface properly. Basically there is little difference between this manual and the free to download manual for the similar PR60 model.
;
Good list of manuals. I found a very rare one and easily get. Should be promptly to download, as we must to wait hours even after confirmed payment.
ENGLISH
FRAN�AIS
DEUTSCH
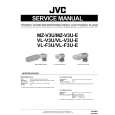
VL-F3U
VIDEO FLASH Instructions
Thank you for purchasing the VL-F3U Video Flash. The VL-F3U Video Flash makes it possible to shoot still video images of objects under low light conditions by emitting a momentary flash. Video Flash has been designed to be attached to the Info-Shoe, which is based on interlocking between the video camera and power supply.
FLASH VIDEO Mode d'emploi
Merci d'avoir porté votre choix sur le flash vidéo VL-F3U. Le flash vidéo VL-F3U permet de prendre des images vidéo fixes d'objets sous éclairage ambiant faible par émission d'un flash momentané. Le flash vidéo est conçu pour être fixé sur le Info-Shoe, basé sur le verrouillage entre la caméra et l'alimentation.
VIDEOBLITZ Bedienungsanleitung
Vielen Dank für den Kauf des VL-F3U Videoblitz Mit dem VL-F3U können Videostandbilder von Objekten, die schwach beleuchtet sind, aufgenommen werden,indem ein momentanes Blitzlicht ausgesendet wird. Der Videoblitz wurde so konstruiert, da� er am Info-Shoe angebracht werden kann, wodurch eine Verriegelung zwischen der Videokamera und der Spannungsversorgung erfolgt.
1
Screw Vis Schraube
1. Attach Video Flash to the Info-Shoe.
the Info-Shoe and tighten the clamping screw by turning it clockwise. To remove Video Flash, first loosen the clamping screw by turning it counterclockwise. s Attach Video Flash so that the flash-emitting area faces the front of the video camera.Video Flash can be panned 180 degrees.
s Apply Video Flash onto the Info-Shoe, push Video Flash firmly into
1. Fixez le flash vidéo sur l'Info-Shoe.
2. Set the switch on Video Flash.
[OFF] [] : Inhibits flashing. : Enables flashing for every shot.
s Placez le flash vidéo sur l'Info-Shoe, poussez-le fermement dans l'Info-Shoe et serrez la vis de serrage en la tournant dans le sens horaire. Pour retirer le flash vidéo, desserrez d'abord la vis de serrage en la tournant dans le sens anti-horaire. s Fixez le flash vidéo de sorte que la zone émettrice du flash soit face à l'avant de la caméra vidéo. Le flash vidéo permet un panoramique de 180 degrés. [OFF] [] : Invalide le flash. : Permet le flash à chaque prise.
1. Den Videoblitz am Info-Shoe anbringen.
s Den Videoblitz auf den Info-Shoe aufsetzen, fest in den Info-Shoe einschieben und die Klemmschrauben durch Drehen im Uhrzeigersinn anziehen. Für Abnahme des Videoblitz, zuerst die Klemmschrauben durch Drehen im Gegenuhrzeigersinn lösen. s Den Videoblitz so anbringen, da� der Aussendebreich für das Blitzlicht auf die Vorderseite der Videokamera weist. Der Videoblitz kann um 180 Grad geschwenkt werden.
3. Adjust the light intensity switch.
Slide-in directions Direction d'insertion Einschieberichtungen
2. Réglez le commutateur sur le flash vidéo. 3. Ajustez le commutateur d'intensité lumineuse.
Si l'image fixe est trop claire ou trop sombre, ajustez le commutateur d'intensité lumineuse. s Pour éclaircir l'image : Réglez à [+]. (Augmente l'intensité lumineuse de +2.) s Pour assombrir l'image : Réglez à [-]. (Diminue l'intensité lumineuse de -2.) Standard : [0]
2. Einstellung des Schalters am Videoblitz
(OFF) () : Blitzlicht gesperrt. : Blitzlicht bei jeder Aufnahme.
If the still image is too bright or dark, adjust the flash light intensity. s To brighten the image : Set to [+]. (Increases the light intensity by +2.) s To darken the image : Set to [-]. (Decreases the light intensity by -2.) Standard : [0]
3.
Einstellung des Lichtstärkeschalters
Wenn das Standbild zu hell oder dunkel ist, die Blitzlichtstärke abstimmen. s Für helleres Bild : Auf (+) einstellen. (Erhöht die Lichtstärke um +2.) s Für dunkleres Bild : Auf (-) einstellen. (Verringert die Lichtstärke um -2.) Standard : [0]
4. Press the still image button to shoot an image.
Safety Precautions
s Do not emit flash light directly into a person�s eyes at a close distance. s Be sure to switch the video camera off before attaching or removing Video Flash. s RISK OF ELECTRIC SHOCK � DO NOT OPEN.
OFF
4. Für Bildaufnahme die Standbildtaste betätigen.
Sicherheitsma�nahmen
s Niemals das Blitzlicht in dichten Abstand direkt auf die Augen einer Person richten. s Vor Anbringung oder Entfernung des Videoblitz sollte die Videokamera ausgeschaltet sein. s GEFAHR ELEKTRISCHER SCHL�GE � NICHT �FFNEN
4. Appuyez sur la touche d'image fixe pour prendre une image.
Règles de sécurité
s N'émettez pas la lumière du flash directement dans les yeux d'une personne à proximité. s Coupez la caméra vidéo avant de fixer ou de détacher le flash vidéo. s RISQUE DE DECHARGE ELECTRIQUE - NE PAS OUVRIR.
2
Operating Precautions
s Video Flash does not emit light during the recording of video moving images. s Video Flash does not emit light when [ ] is not displayed in the LCD screen. s To prevent the whitening of an image due to flash light, the video camera darkens the image automatically at the moment Video Flash emits light. As a result, the still image of any area outside the reach of flashlight becomes darker than usual. If you require to shoot an object located at a longer distance than the reach of the flashlight, set the switch on Video Flash to [OFF]. s The blinking [ ] in the LCD screen indicates that the Video Flash is being charged. Charging may take up to about 10 seconds. s Video Flash does not emit light when �Gain Up� of the video camera is set to [OFF] or when �Program AE� is set to �Night View�. s The Video Flash does not light up when the indicator blinks due to a low battery. s After Video Flash is attached onto the Info-Shoe on the camera, do not carry the combination by holding Video Flash. s Be careful when carrying the video camera on which Video Flash is attached.
Vorsichtsma�nahmen für Bedienung Précautions pour l'emploi
s Le flash vidéo n'émet pas de lumière pendant l'enregistrement d'images vidéo. s Le flash vidéo n'émet pas de lumière quand [ ] n'est pas affiché sur l'écran LCD. s Pour éviter le blanchissement de l'image à cause de la lumière du flash, la caméra vidéo assombrit automatiquement au moment où le flash vidéo émet l'éclair. Il en résulte que l'image fixe de toute zone hors de portée de l'éclair devient plus sombre que nature. Pour prendre un objet éloigné hors de portée de l'éclair, réglez le commutateur du flash vidéo sur [OFF]. s Le [ ] clignotant sur l'écran LCD indique la charge du flash vidéo. La charge peut demander jusqu'à 10 secondes. s Le flash vidéo n'émet pas de lumière quand "Gain Up" est réglé sur [OFF] ou quand "Program AE" est réglé à "Night View" sur la caméra vidéo. s Le flash vidéo ne s'allume pas quand l'indicateur clignote parce que les piles sont affaiblies. s Quand le flash vidéo est fixé sur l'Info-Shoe de la caméra, ne portez pas l'ensemble en le tenant par le flash vidéo. s Soyez prudent en portant la caméra vidéo avec le flash vidéo attaché. s Während der Aufnahme bewegter Videobilder sendet der Videoblitz kein Blitzlicht aus. s Wenn in der LCD-Anzeige nicht ( ) angezeigt wird, sendet der Videoblitz kein Blitzlicht aus. s Um eine eine Aufhellung des Bildes aufgrund des Blitzlichts zu vermeiden, verdunkelt die Videokamera das Bild automatisch im Moment ,wenn der Videoblitz das Blitzlicht aussendet. Dadurch ist das Standbild au�erhalb des Blitzlichtbereichs dunkler als gewöhnlich. Für Aufnahme eines Objekts, das zu weit entfernt ist, um vom Blitzlicht erreicht zu werden,den Schalter am Videoblitz auf (OFF) einstellen. s Wenn ( ) auf dem LCD-Bildschirm blinkt, dann wird der Videoblitz aufgeladen. Das Aufladen kann bis zu 10 Sekunden dauern. s Der Videoblitz sendet kein Blitzlicht aus, wenn "Gain Up" der Videokamera auf (OFF) oder wenn "Program AE" auf "Night View" eingesteltl ist. s Der Videoblitz leuchtet nicht auf, wenn die Anzeige aufgrund niedriger Batteriespannung blinkt. s Nach Anbringung des Videoblitz am Info-Shoe, niemals für das Tragen dieser Aufbaukombination den Videoblitz umfassen. s Beim Tragen einer Videokamera mit angebrachtem Videoblitz vorsichtig sein.
3
�2 �1 0 +1 +2
BRIGHT
-2 -1 0 +1 +2
Main Specifications
Dimensions : 38 mm (W) x 43 mm (H) x 69 mm (D) Weight : 45 � Flash reach distance (With the GR-DV2000) : XGA, VGA : Approx. 5 m UXGA : Approx. 2 m s Design and specifications are subject to change without notice.
Spécifications principales
Dimensions : (LxHxP) 38 mm x 43 mm x 69 mm Poids : 45 � Portée du flash (avec le GR-DV2000) : XGA, VGA : env. 5 m UXGA : env. 2 m s La conception et les spécifications sont sujettes à modification sans préavis.
Hauptspezifikationen
Abmessungen : 38 mm (B) x 43 mm (H) x 69 mm (T) Gewicht : 45 � Blitzlichtreichweite (Mit dem GR-DV2000) : XGA, VGA : Ca. 5 m UXGA : Ca. 2 m s �nderungen des Designs und der technischen Daten ohne Vorankündigung vorbehalten.
KAJ0283A
© 2000 VICTOR COMPANY OF JAPAN, LTD.
 $4.99 VLV3U JVC
Service Manual Complete service manual in digital format (PDF File). Service manuals usually contains circuit diagr…
|
|
|
> |
|